

 Français
 Nederlands
 English
Create and send an email campaign
The Marketing Campaign module in your client area lets you build your contact lists, write your emails, send them, and track opens, clicks and unsubscribes — with no external tool.
A campaign is built on four building blocks that you set up once and then reuse for every send.
The SMTP configuration
The server that actually sends your emails. Set it up once and for all.
The lead lists
Your contacts, grouped by list (prospects, clients, trade show…), entered by hand or imported via CSV.
The HTML templates
The layout of your email, with variables that personalise each message.
The campaign
The send itself: a list + a template + a subject, then tracking the results.
Accessing the module
Log in to your client area at portal.gigaweb.be, then click Marketing Campaign in the left-hand menu.
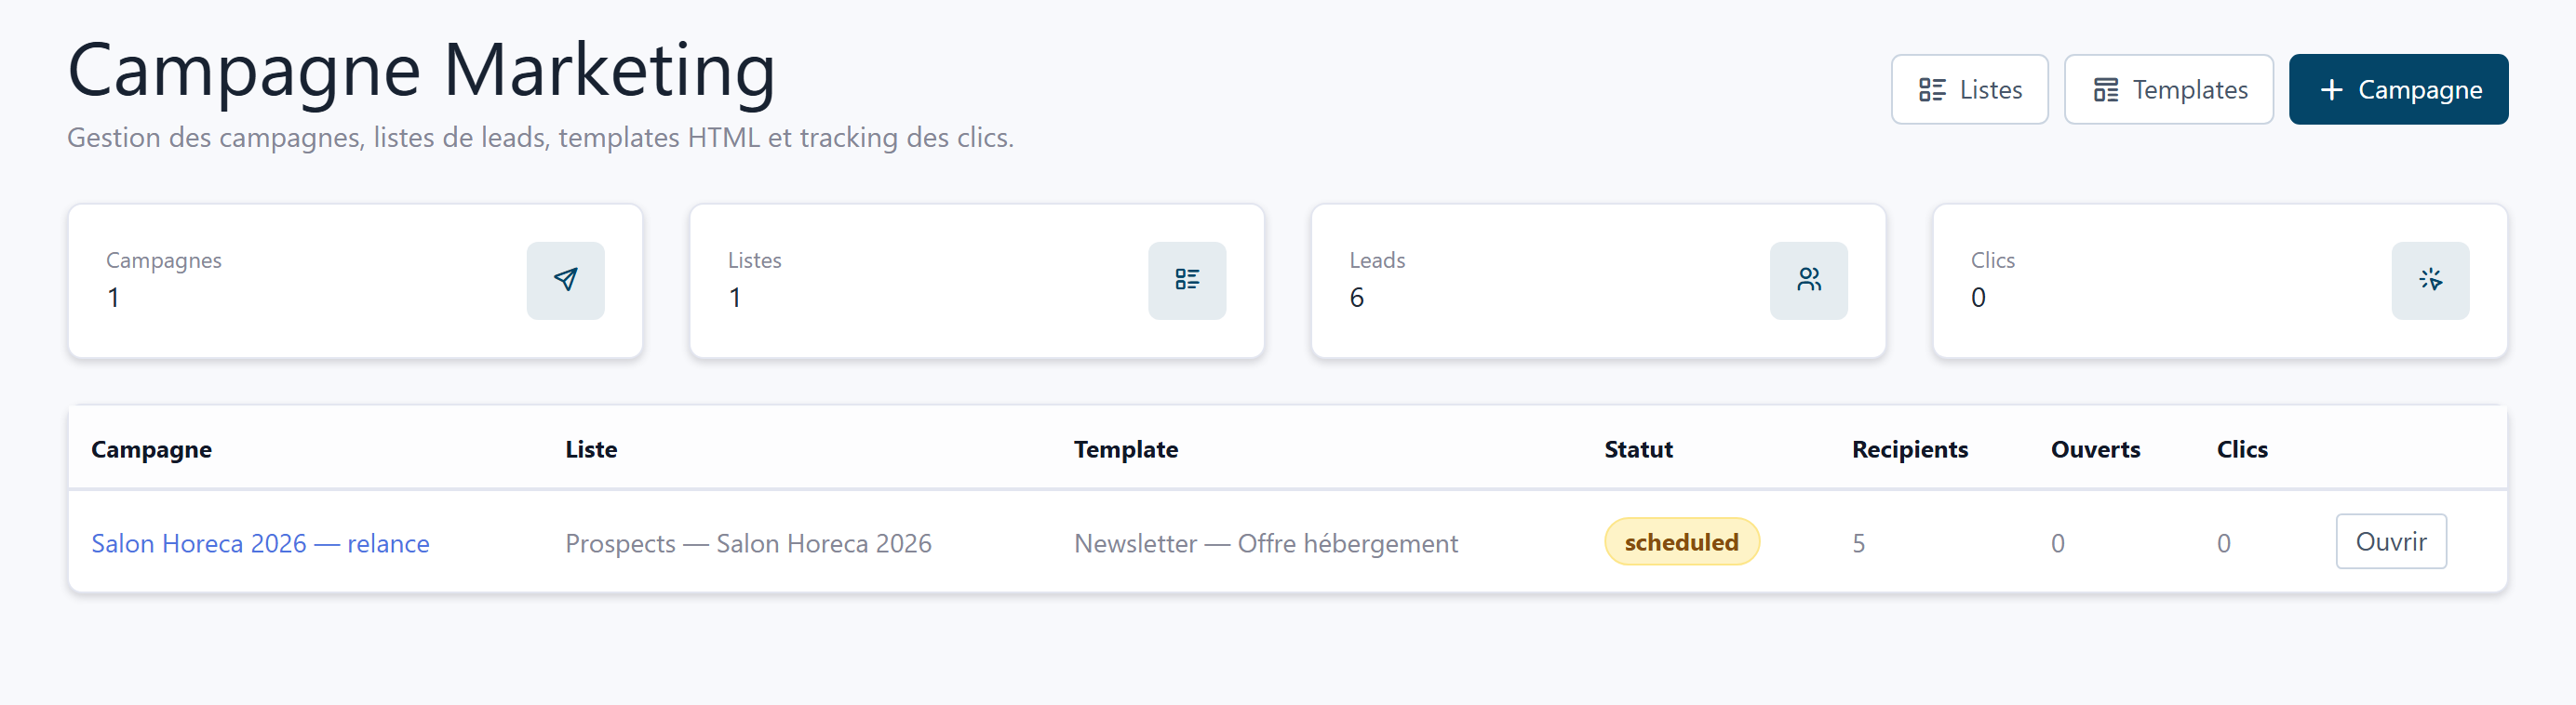
The module's home page shows four counters (campaigns, lists, leads, clicks) and the list of your campaigns with, for each one, its status, number of recipients, opens and clicks. The buttons at the top right lead to Lists, to Templates, and let you create a new Campaign.
Step 1 — Set up sending (SMTP)
No email can go out until the sending server has been entered and is active. This configuration is shared by all your campaigns: you only fill it in once. It's found under the SMTP tab, inside any campaign.
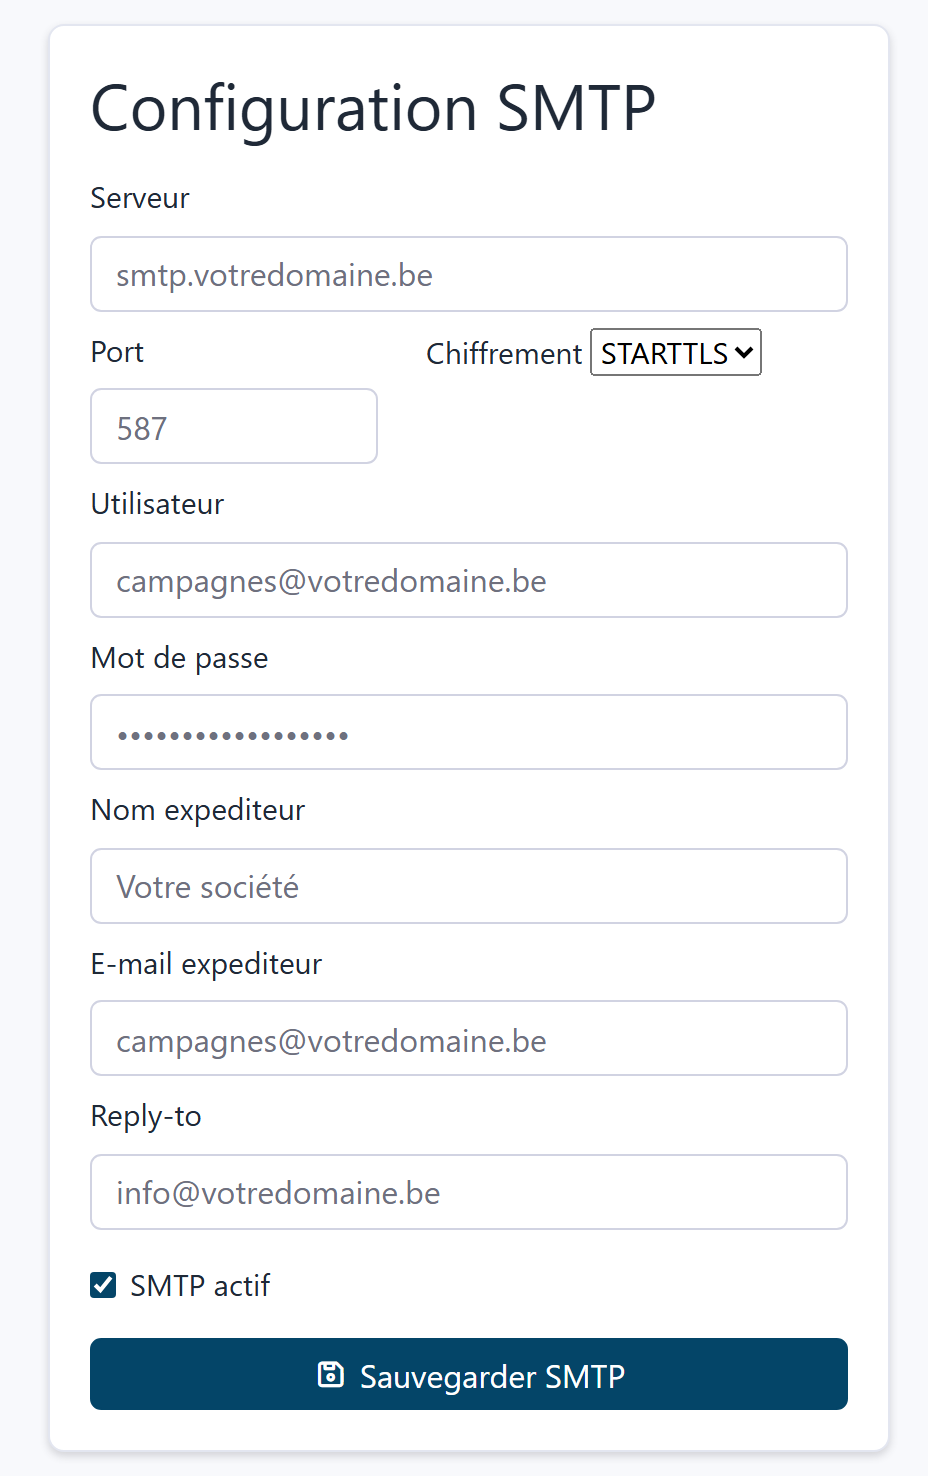
The name and sender address actually used are those from this SMTP configuration, not the ones entered on the campaign. If you change senders, update it here.
If you come back to this form later, leave the Password field blank to keep the one already saved.
Step 2 — Create a lead list
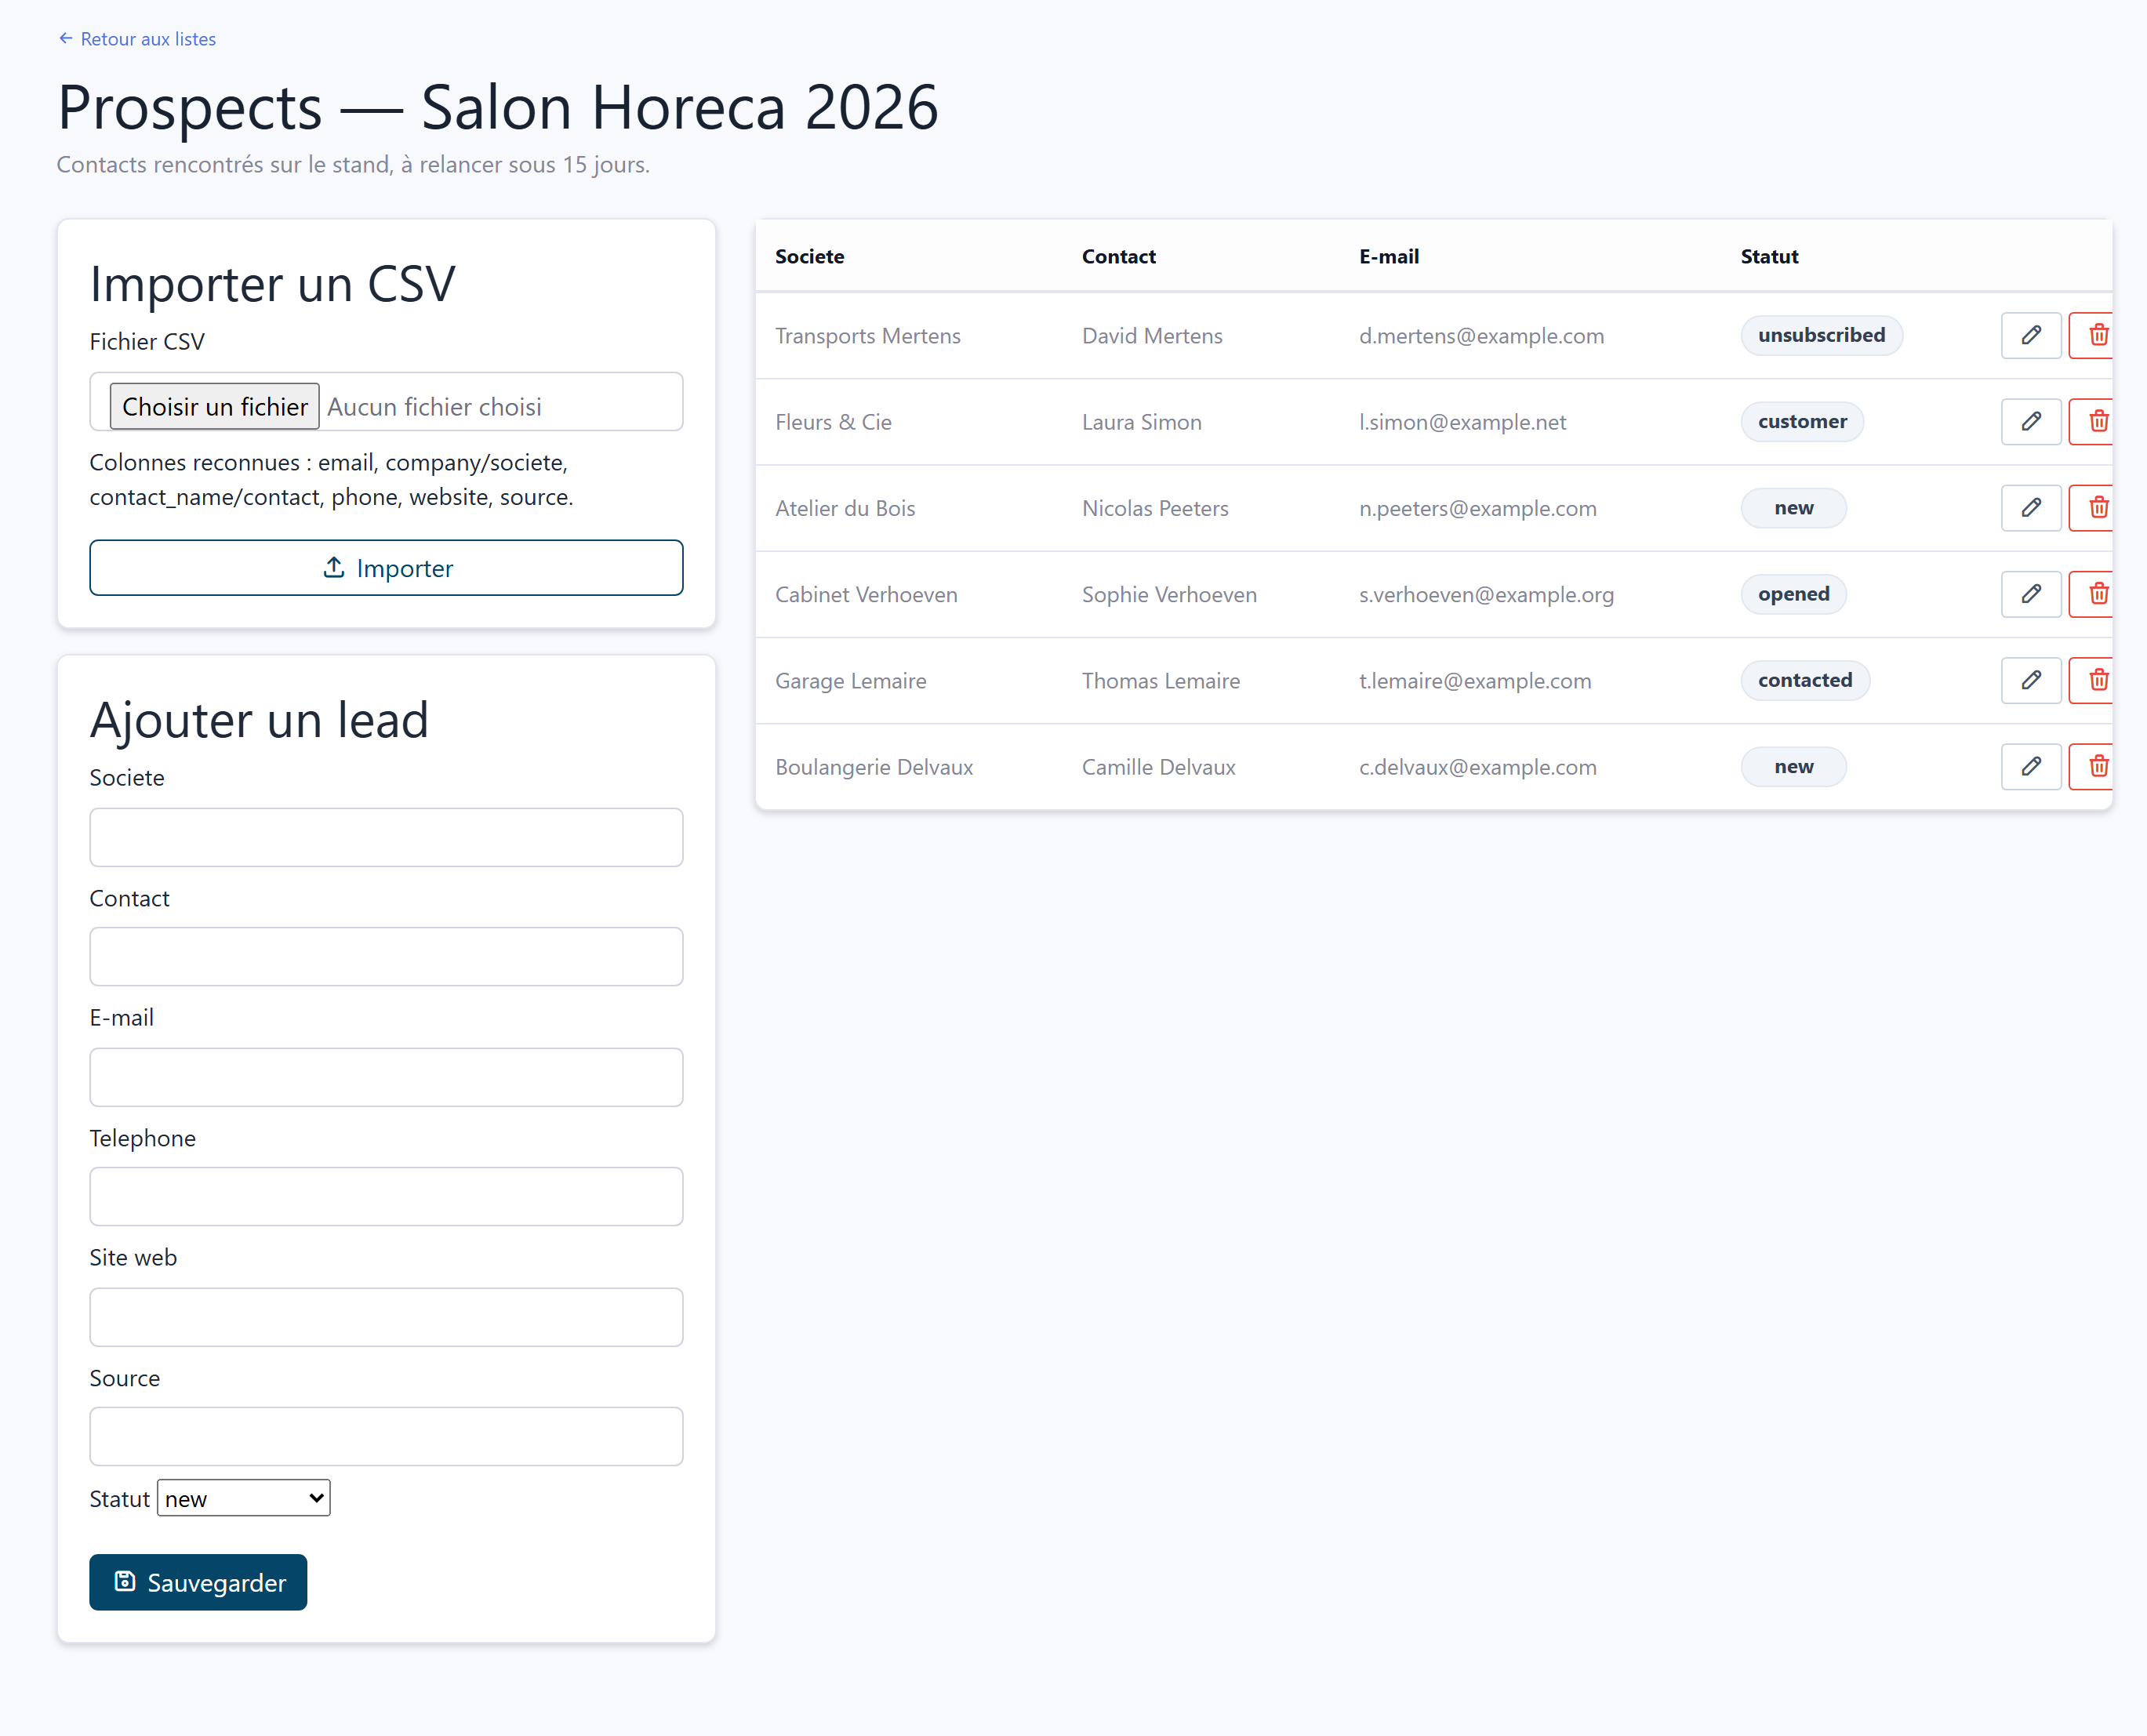
From the dashboard, click Lists. Give your list a name (and a description if useful), then Save. You can create as many lists as you like and manage them independently.
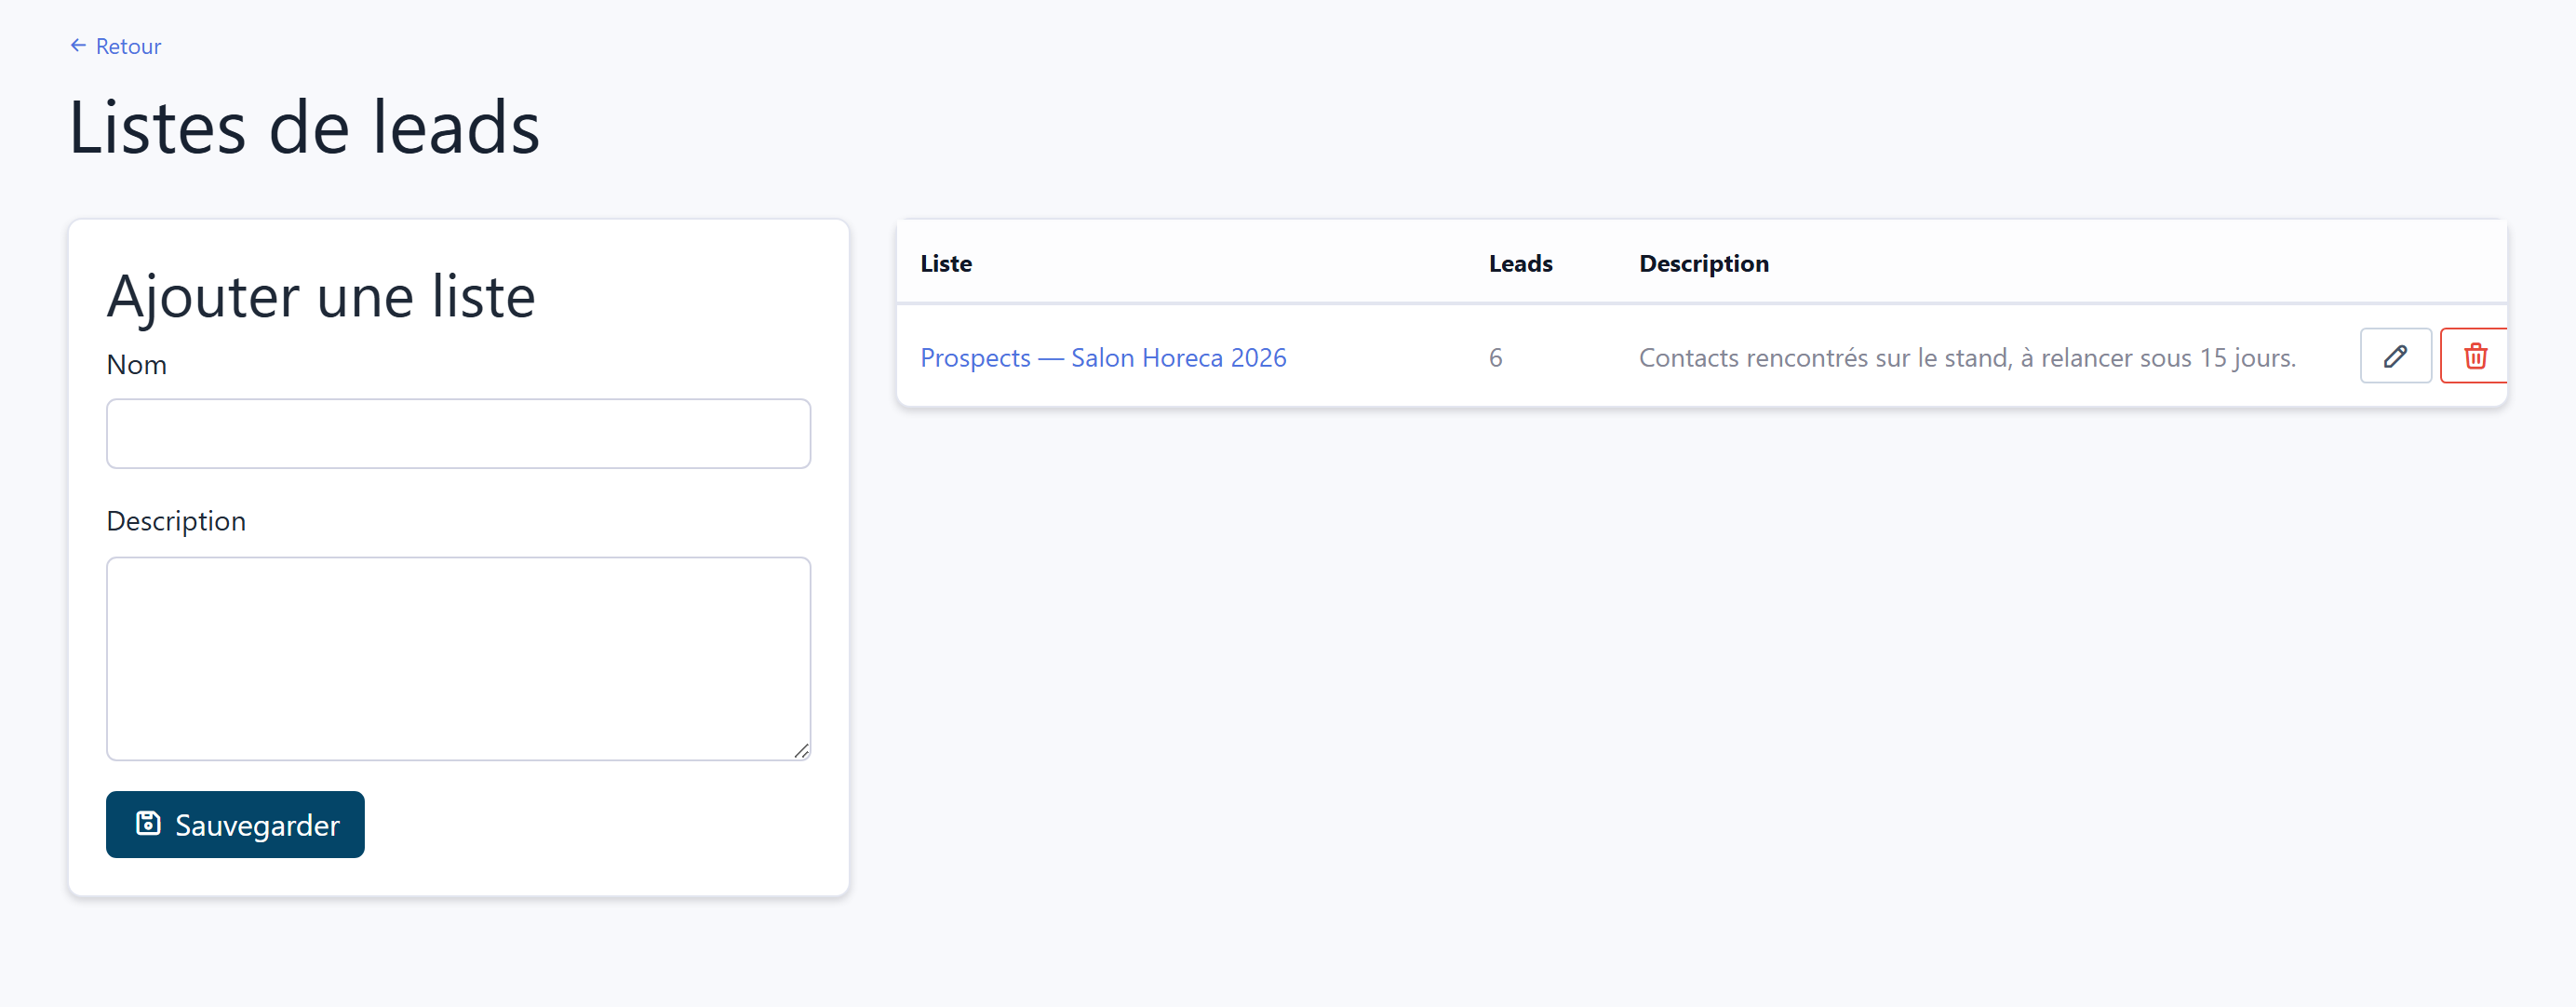
Then click the list's name to add your contacts to it. Two methods are available.
Adding a contact by hand
Fill in the Add a lead form: company, contact, email, phone, website, source and status. Only the email address is required, and it must be unique within the list. The pencil icon at the end of the row lets you edit an existing contact.
Importing a CSV file
To load several hundred contacts at once, use the Import a CSV box. The expected separator is the semicolon (;). Put a header row first: the following column names are recognised automatically, in both French and English.
If your file has no header row, the columns are read in this order: email ; company ; contact ; phone ; website ; source.
At the end of the import, a message shows the number of contacts created or updated and the number of rows skipped. Rows with an invalid email address are skipped, without blocking the rest of the file.
Re-importing the same file doesn't create duplicates: a contact already in the list (same email address) is simply updated. An unsubscribed contact stays that way — importing never reactivates it.
Step 3 — Write an HTML template
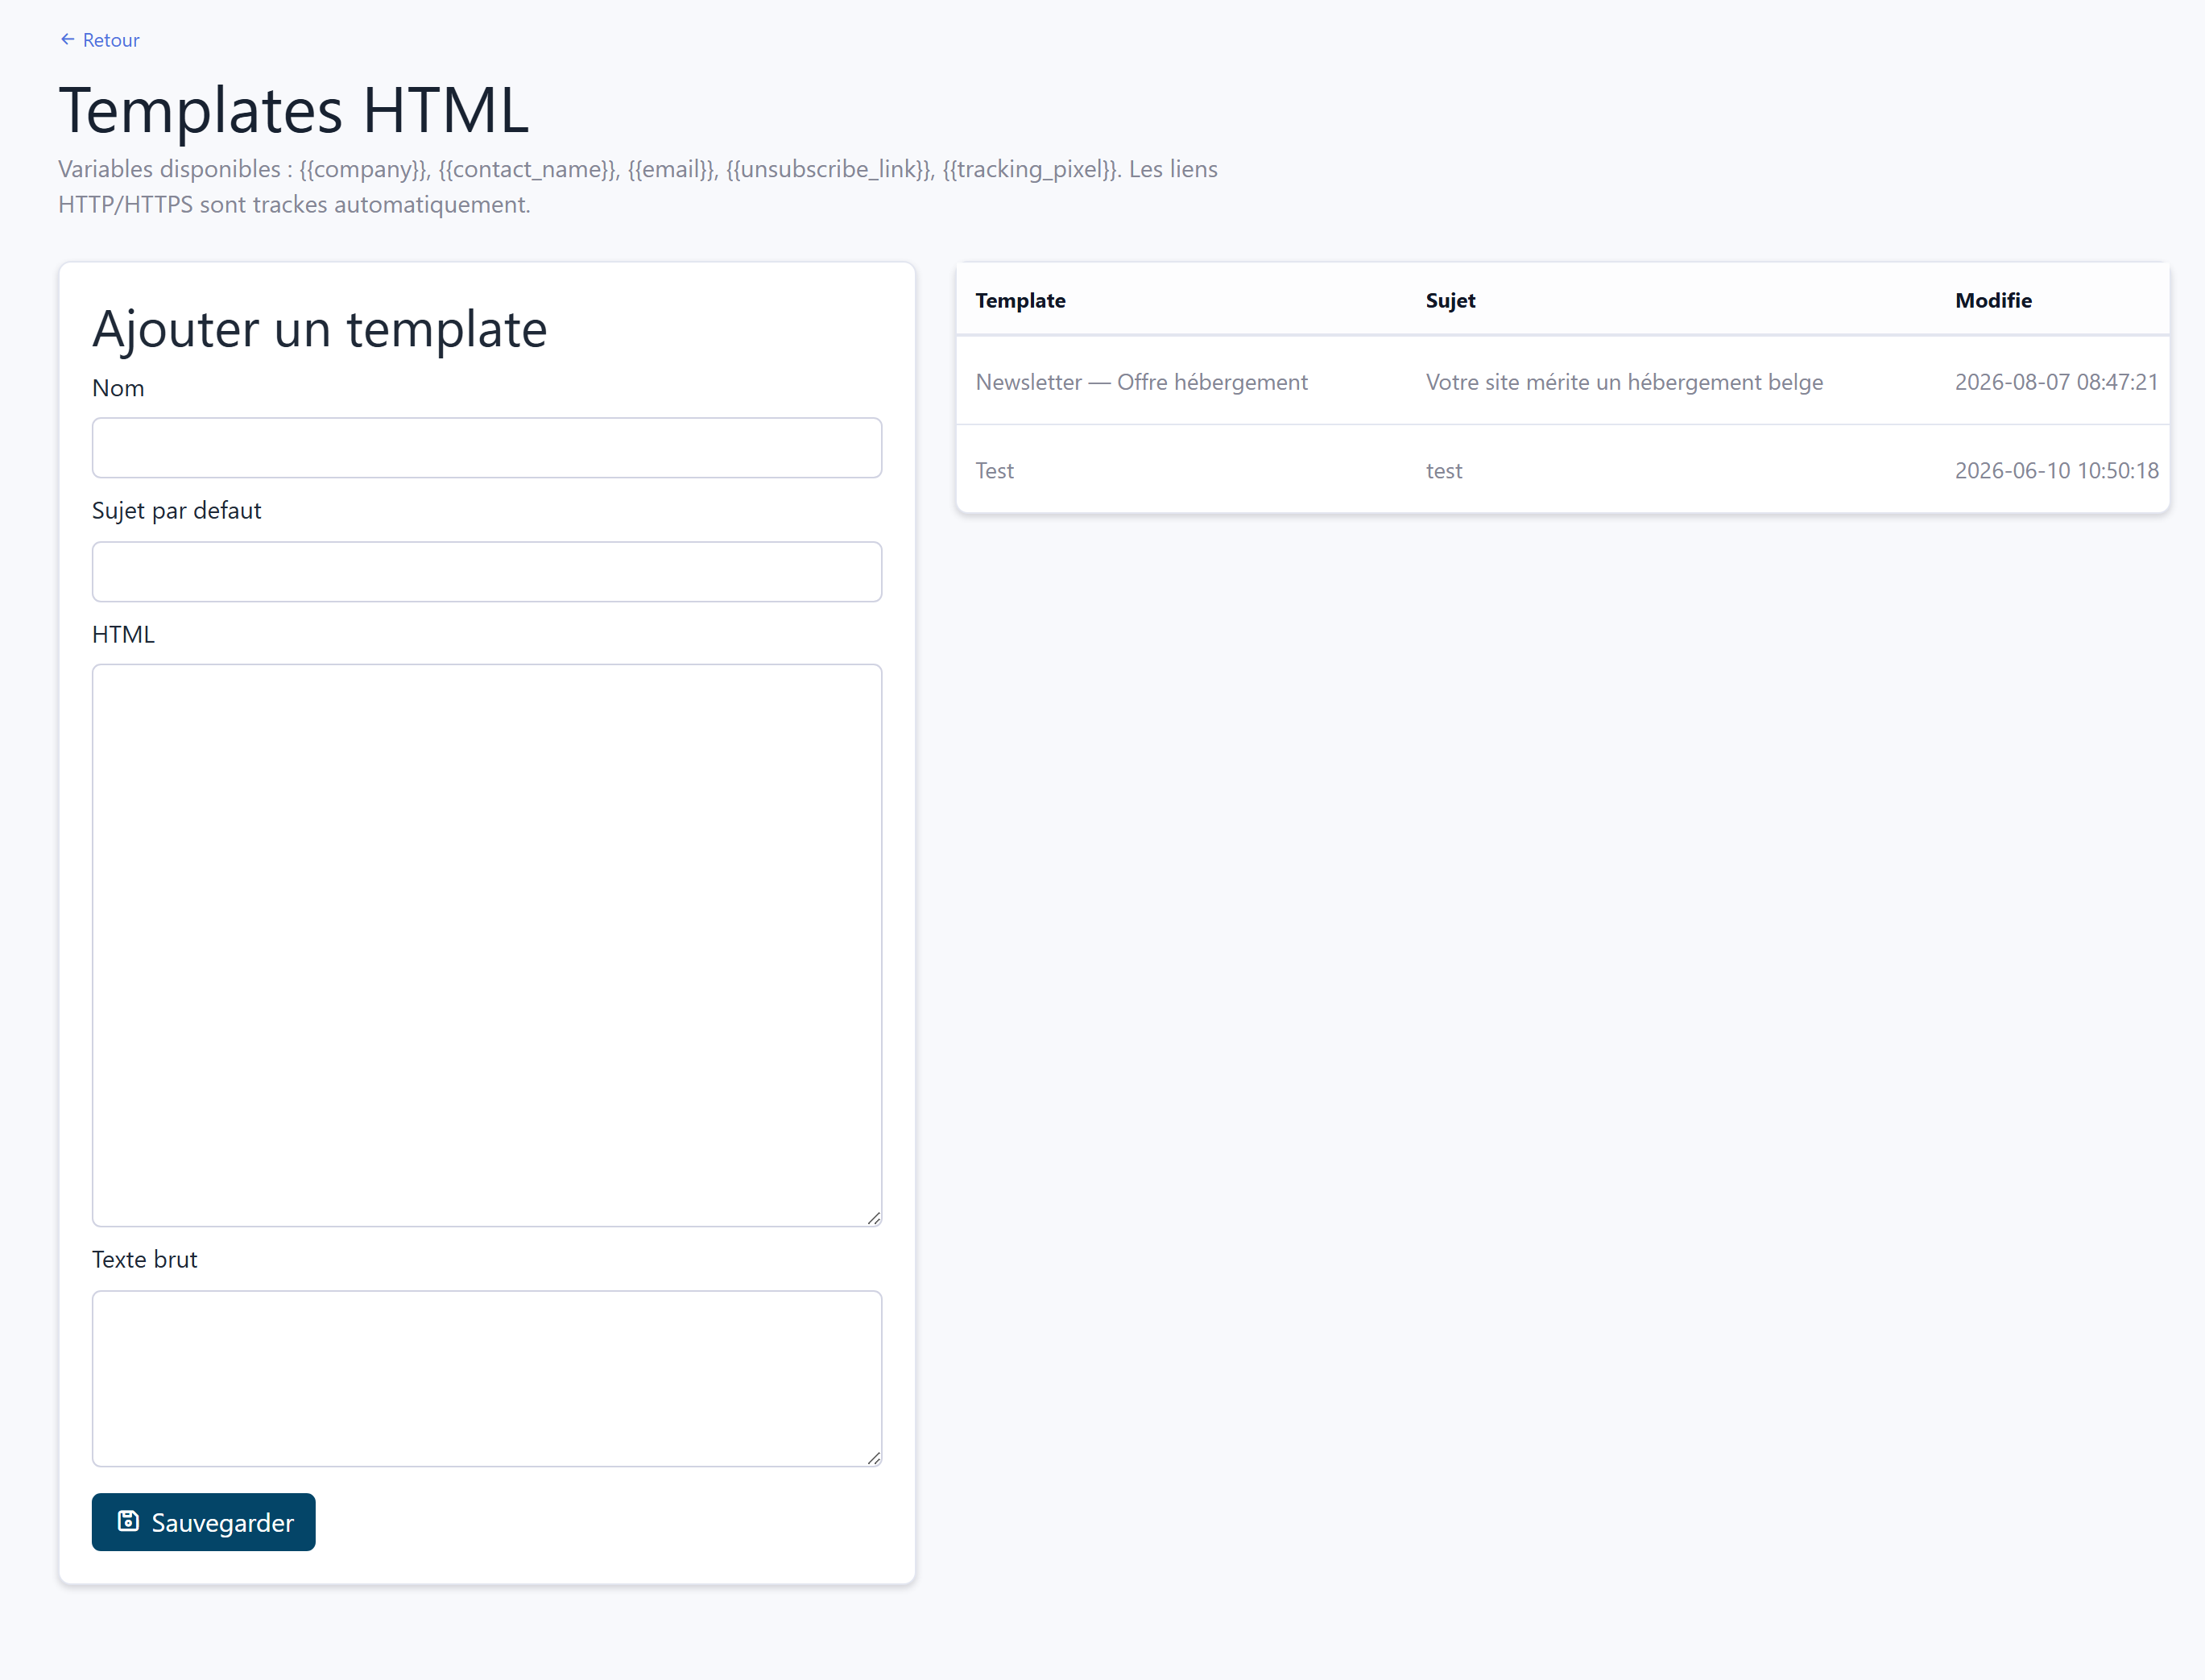
From the dashboard, click Templates. A template consists of a name, a default subject, the message body in HTML and, if you wish, a plain text version for email software that doesn't display HTML. If you leave the plain text blank, it's generated automatically from the HTML.
Personalising with variables
Insert these variables in the subject or in the HTML: they're replaced with the recipient's data when the email is sent.
Example message opening:
<p>Hello {{contact_name}},</p>
<p>We support companies like {{company}} in…</p>
<p><a href="https://gigaweb.be/en/hebergement">Discover our offers</a></p>
<p style="font-size:12px;color:#888;">
  No longer want to receive our emails?
  <a href="{{unsubscribe_link}}">Unsubscribe</a>
</p>
Your links are tracked automatically. All http and https links in your HTML are rewritten at send time to count clicks — you don't need to do anything. mailto: links, tel: links and internal anchors are left unchanged. Likewise, if you don't insert {{tracking_pixel}} yourself, it's added at the end of the message.
Always remember to include {{unsubscribe_link}}: it's a legal requirement for commercial email, and it greatly reduces the risk of being flagged as spam.
Step 4 — Create the campaign
From the dashboard, click Campaign, then fill in the form.
draft while you prepare your send.An idea for {{company}}.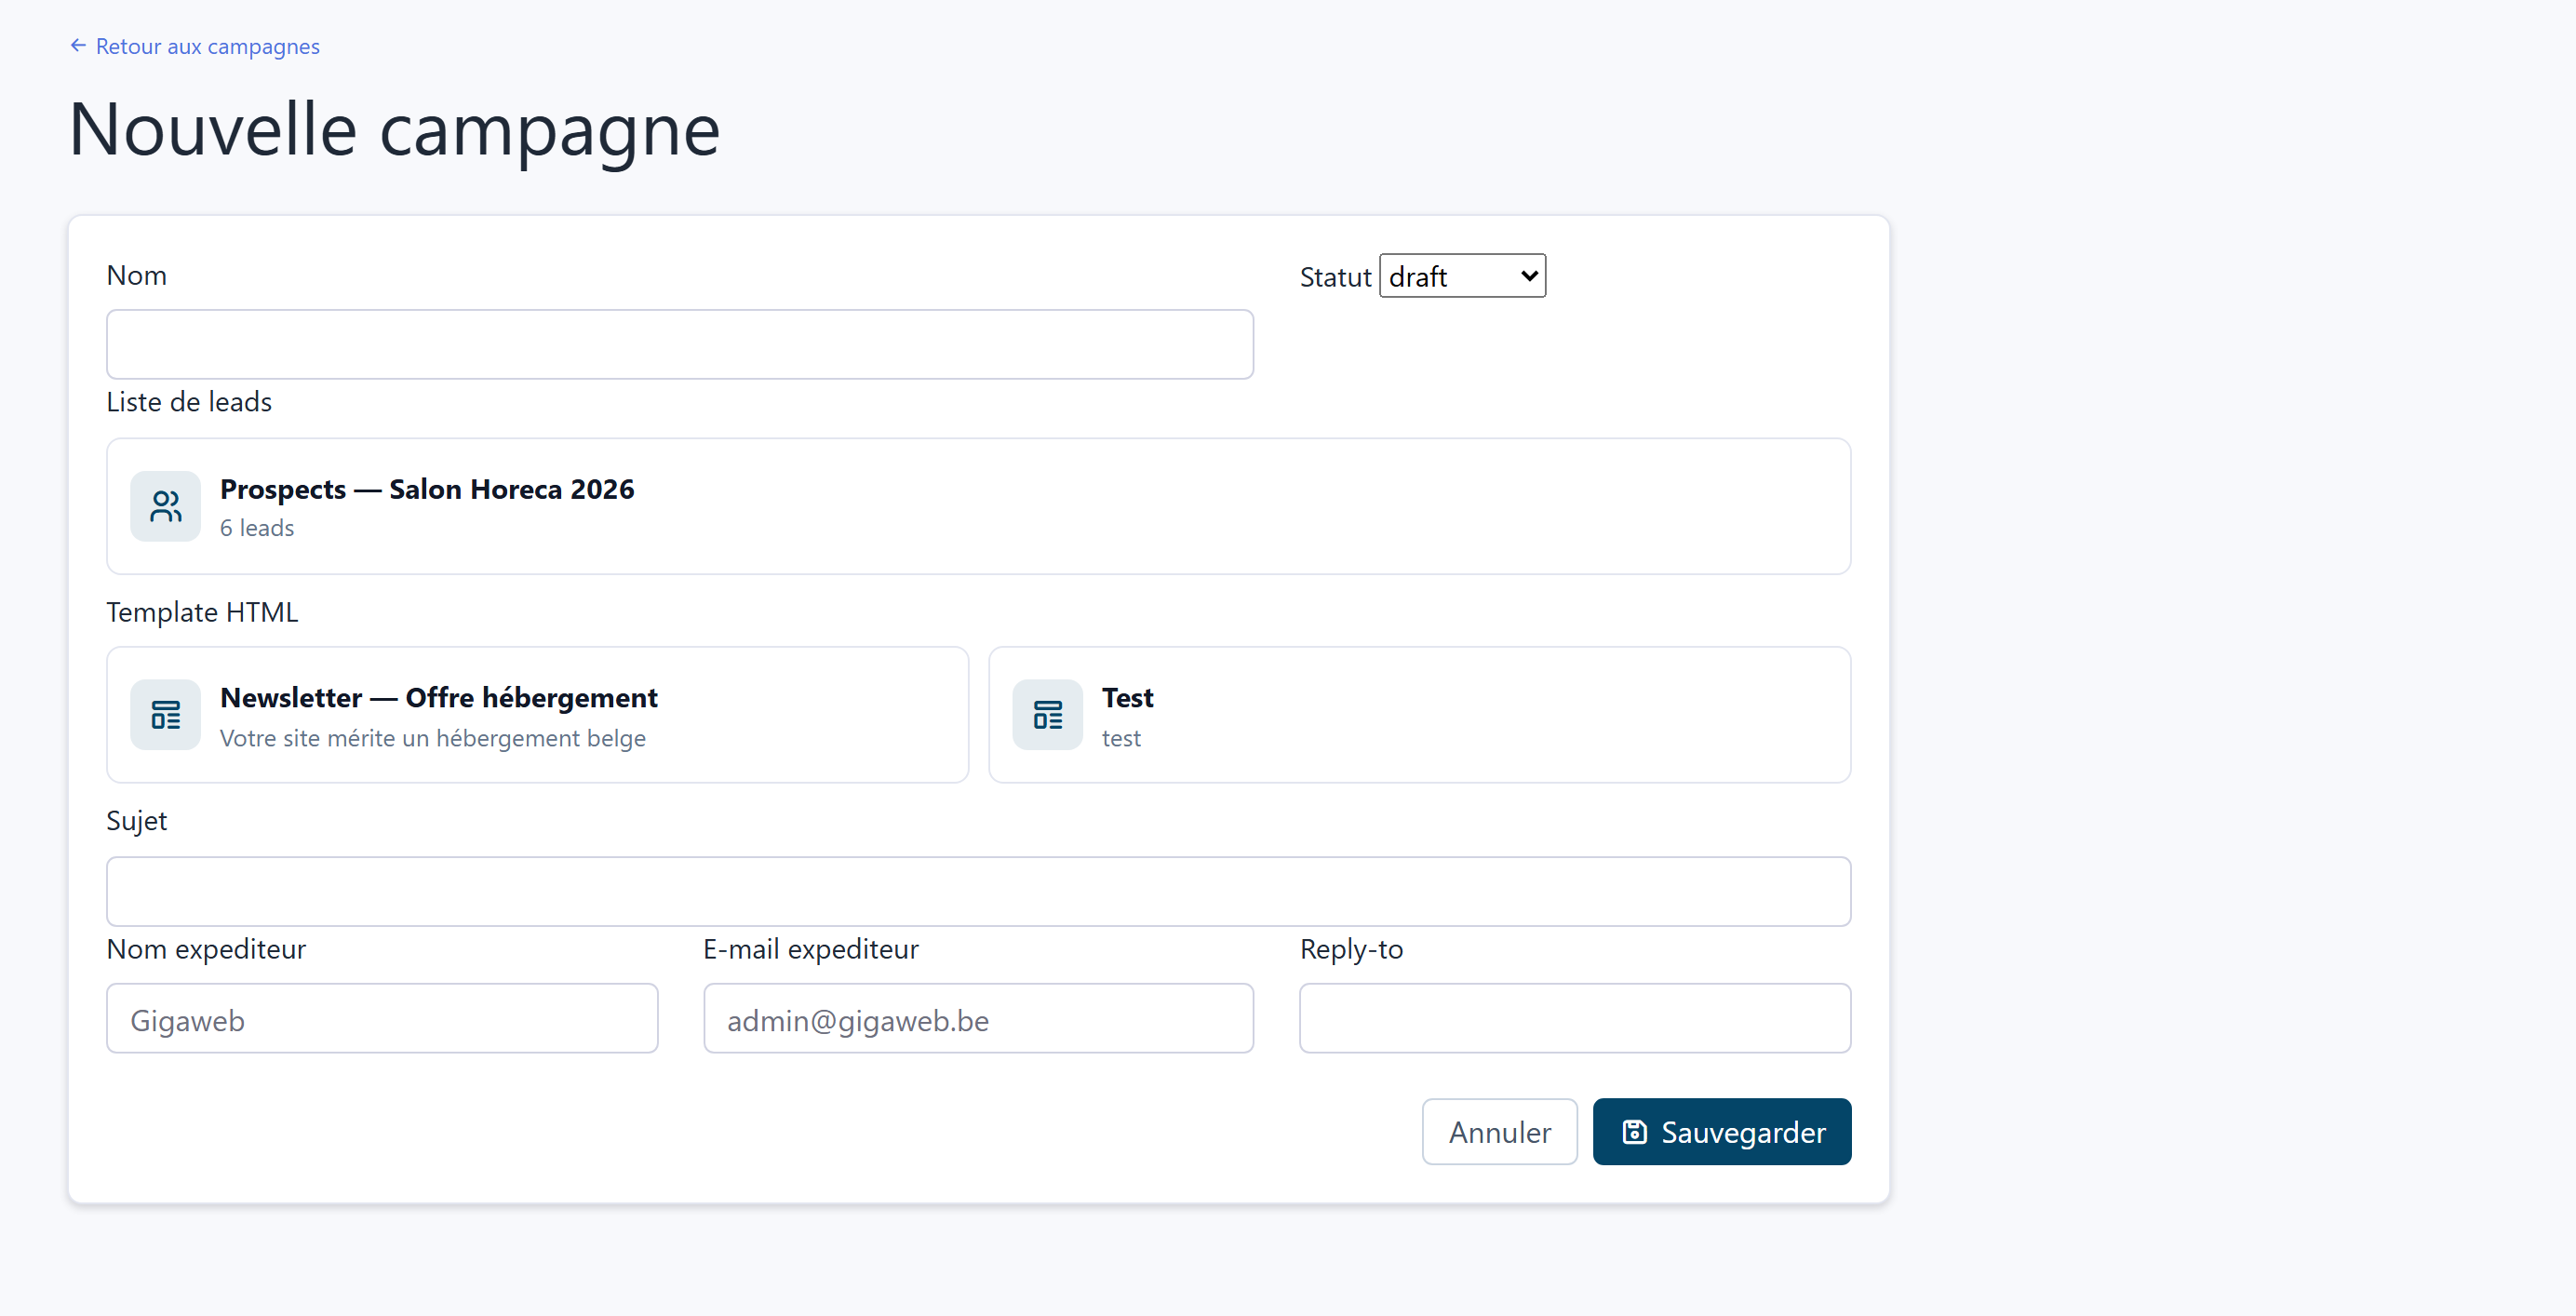
Step 5 — Generate the queue, then send
Once the campaign is saved, you land on its detail page. Two buttons control sending.

Generate the queue
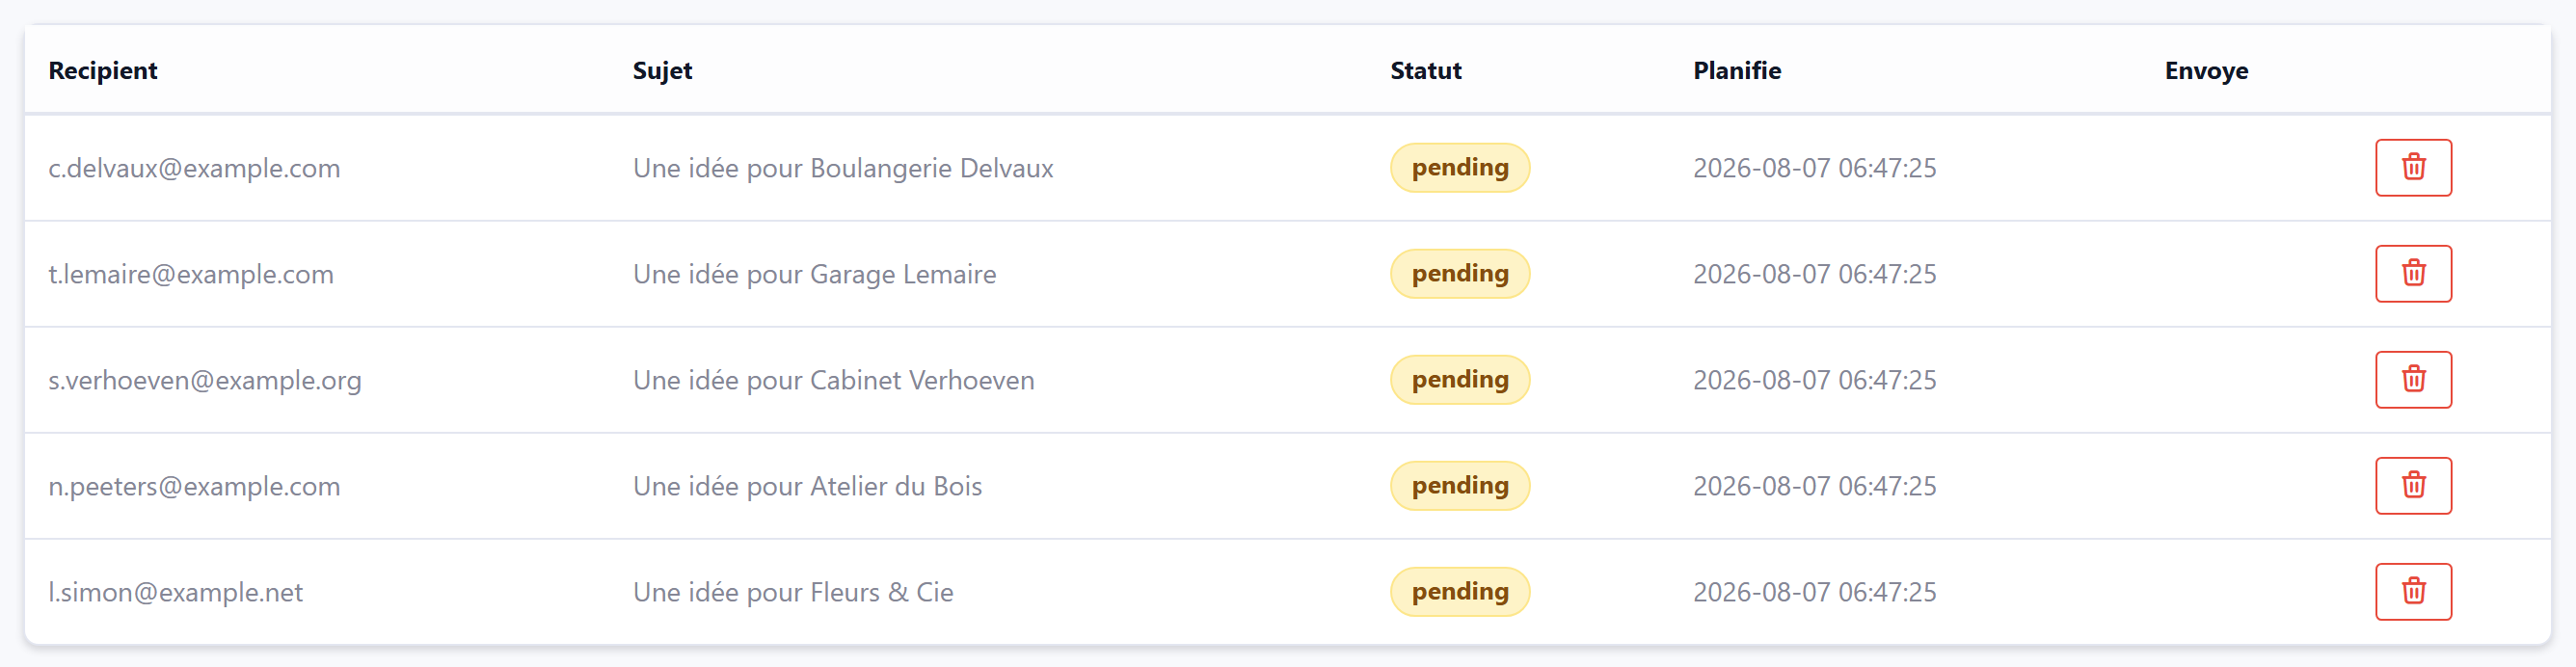
Prepares a personalised email for each contact in the list and places it on hold, without sending anything. It's a chance to check, in the Queue tab, that the subject and recipients are correct.
Send now
Sends the pending emails. If the queue is empty, it's generated automatically first — so you can click this button directly. A confirmation is requested.
At the end of the operation, a message summarises the number of emails sent and the number of failures. Unsubscribed or invalid contacts are automatically excluded, and a contact already in the queue is never added to it twice.
Two things to know before your first send:
- Sending is always triggered manually. A campaign with status
scheduledwaits for your click on Send now: nothing goes out on its own. - Each click on Send now processes up to 200 emails. For a longer list, click the button again until the queue no longer contains any
pendingrows.
Always run a test before the real send: create a test list containing only your own address, run the campaign on it, and check how it renders in your inbox.
Tracking results
The campaign page is organised into five tabs.
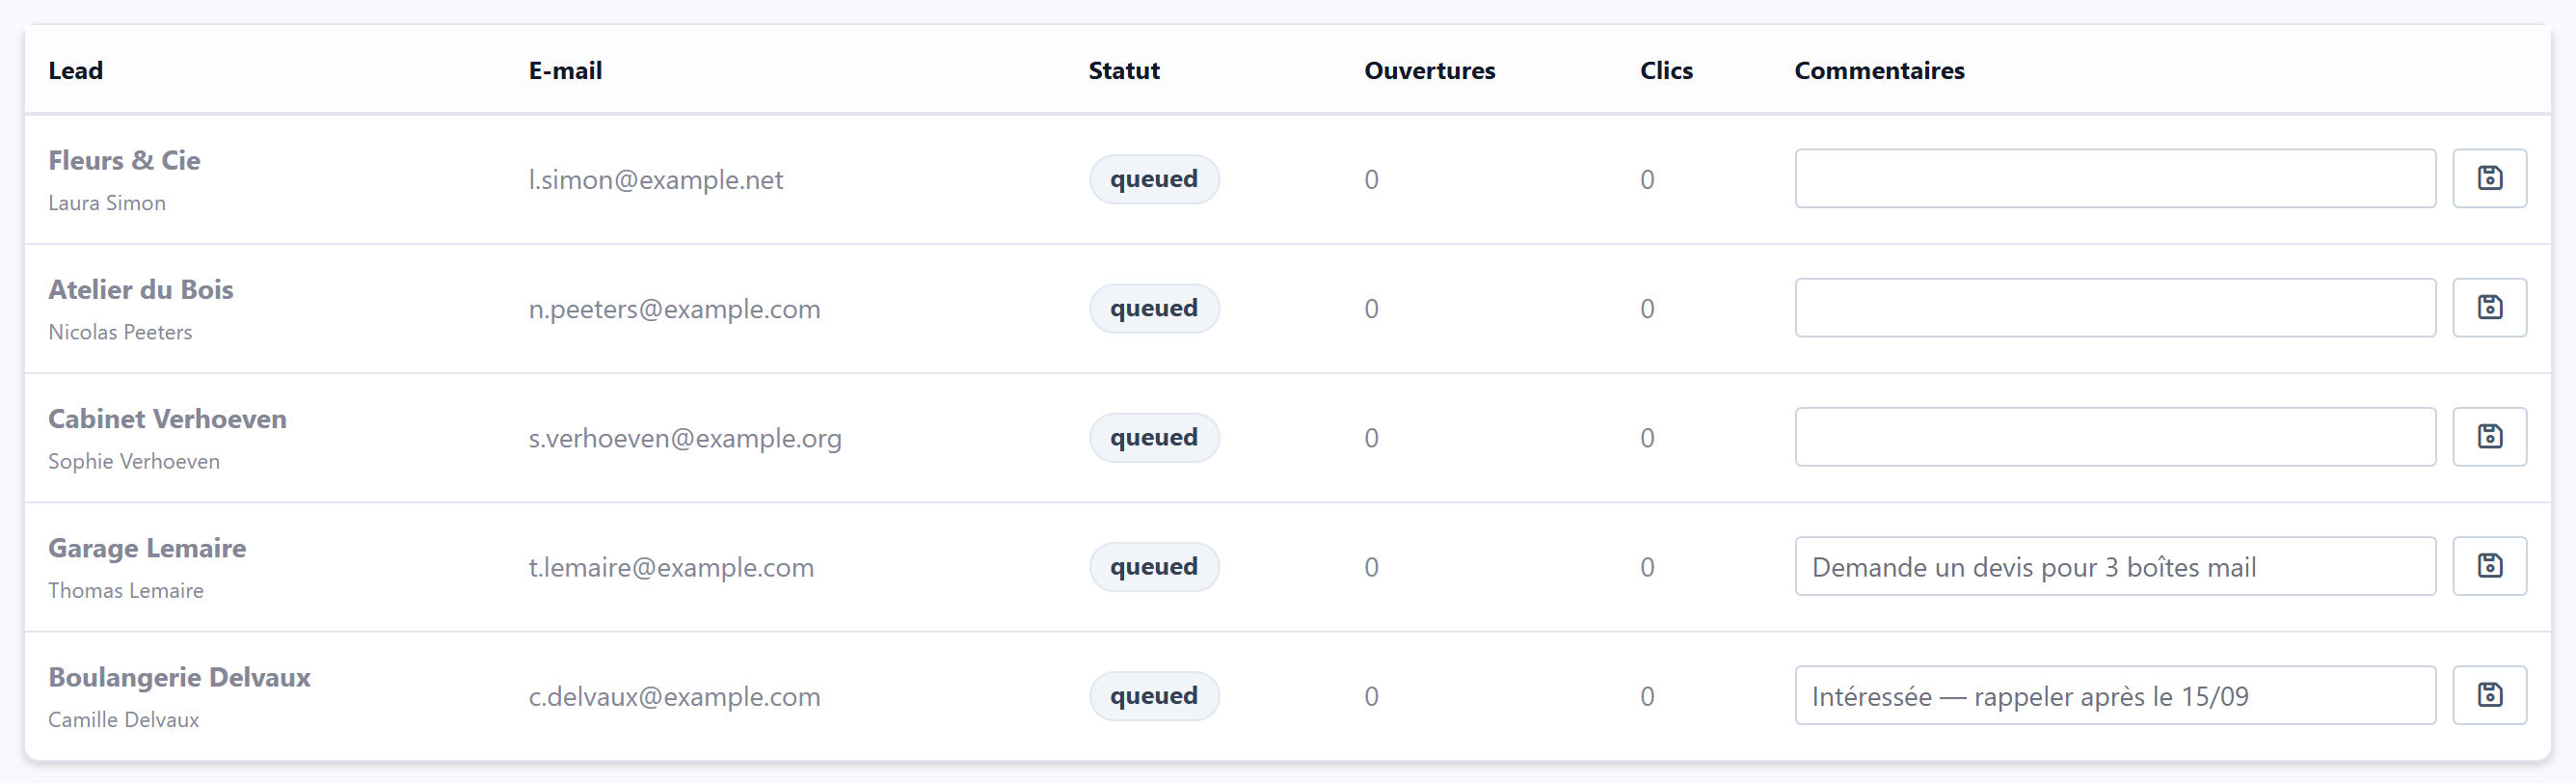
Opens rely on the display of an invisible image. Since many email clients block images by default, the actual number of opens is in practice higher than what's shown. Clicks, on the other hand, are measured reliably.
Understanding statuses
A campaign's status updates on its own as sending progresses.
On the recipient side, status moves from queued (pending) to sent (sent), then opened (opened) and clicked (clicked). It can also change to unsubscribed, bounced (address that rejects the message) or failed.
Unsubscribing and GDPR
Each recipient receives their own unique unsubscribe link. When they use it:
- their request is logged with its date and any reason given, visible in the Unsubscriptions tab;
- their status changes to
unsubscribedin your lead list; - they are automatically excluded from all your future campaigns, even if you re-import their address via CSV.
You remain responsible for the data you load into the module and for the legal basis of your sends. A few principles to follow: only contact people for whom you have consent or a demonstrable legitimate interest, always keep the unsubscribe link in your emails, clearly identify your company in the message, and handle any deletion request without delay. Our privacy policy details our role as a host in this processing.
Troubleshooting
No SMTP configuration has been saved, or the SMTP active switch is off. Go back to step 1.
Open the SMTP tab: the log's Response column gives the server's exact error message. The most common causes are an incorrect password, a mismatched port/encryption pair (587 with STARTTLS, 465 with SSL), or a username that must be the full email address.
This is normal beyond 200 recipients: each click on Send now processes at most 200 emails. Click the button again until the Queue tab no longer shows any pending row.
Send from an address on your own domain, check that your SPF, DKIM and DMARC records are in place, avoid messages made up of a single large image, keep the unsubscribe link, and ramp up volume gradually rather than sending several thousand emails at once from a brand-new address.
Check their status in the lead list: contacts marked unsubscribed and invalid are deliberately excluded from sends. Also check that they actually belong to the list selected on the campaign.
The variable name is misspelled. Follow the exact case and double braces, with no spaces: {{contact_name}} and not {{ contact_name }} or {{Contact_Name}}.
We can set up your SMTP configuration, design your template in your brand's colours, or support you through your first campaign. Contact us.